FFL Connect Setup Guide
From a new API key to a working FFL dealer picker on your WooCommerce checkout. Most stores are done in about ten minutes.
1 What you need
- WordPress 6.2 or newer with WooCommerce active, on PHP 7.4 or newer.
- An FFL Connect API key. It is emailed to you straight after purchase. No key yet? Get an annual licence.
- A checkout page that uses the classic checkout. Step 5 shows how to check and how to switch.
2 Install the plugin
- Download the plugin zip using the link in your licence email, or here: ffl-connect-for-woocommerce-1.1.0.zip.
- In your WordPress admin go to Plugins › Add New Plugin › Upload Plugin.
- Choose the zip file, press Install Now, then Activate Plugin.
Do not unzip the file first. WordPress wants the zip itself.
3 Enter your API key
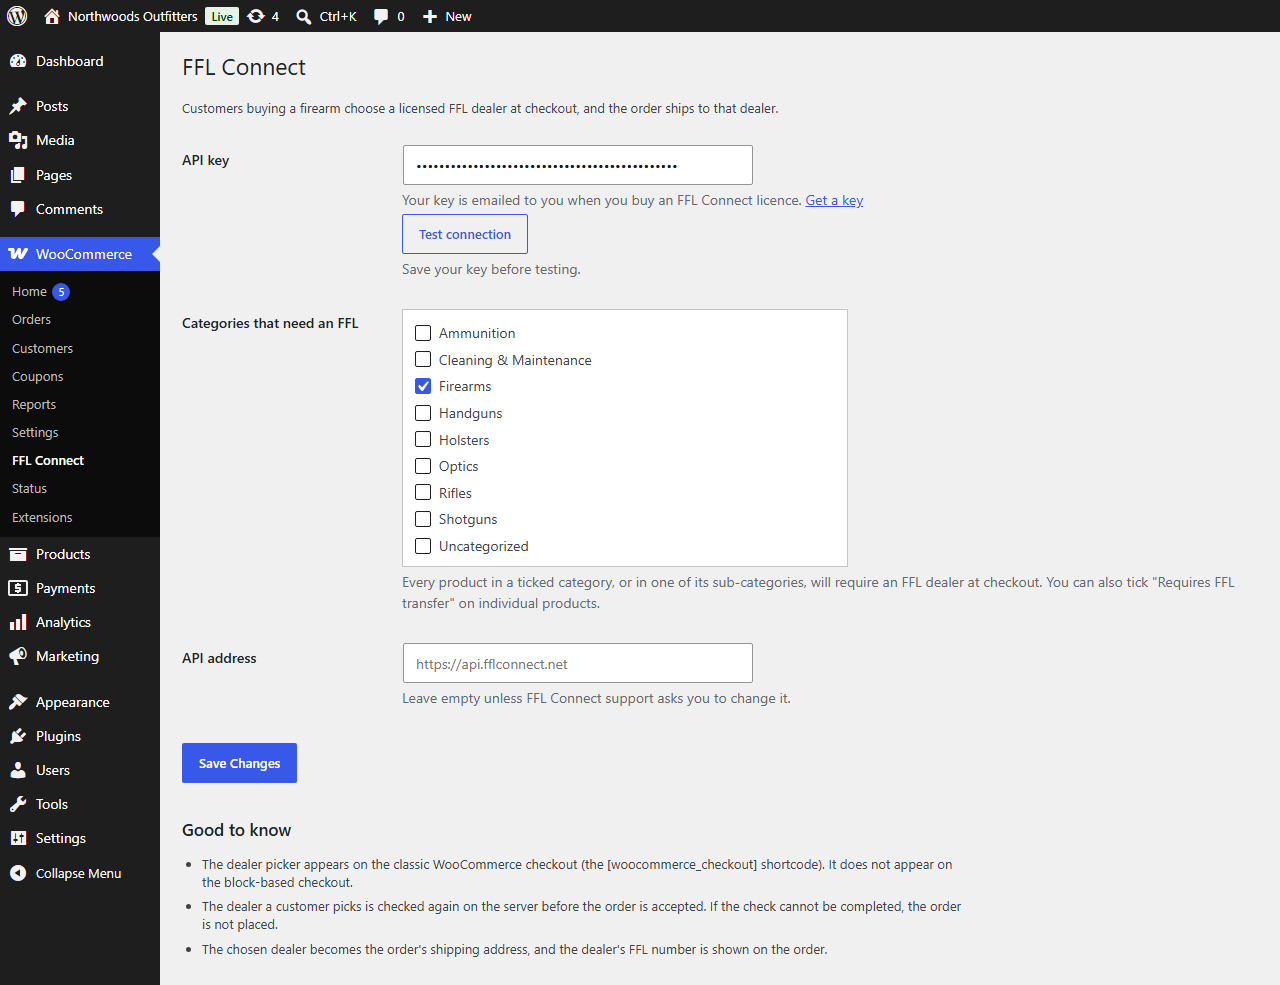
- Go to WooCommerce › FFL Connect.
- Paste your API key into the API key box and press Save Changes.
- Press Test connection. A green message confirms that your store can reach the dealer database.
4 Mark your FFL products
The dealer picker appears only when the cart holds something that has to ship to a dealer. There are two ways to say which products those are, and you can use both.
By category (fastest)
On the same settings page, tick every product category that needs a transfer, for example Handguns, Rifles, Shotguns and Receivers, then press Save Changes. Every product in those categories is covered, including ones you add later.
Product by product
Edit a product, open Product data › General, tick Requires FFL transfer and update the product. Use this for one-off items that sit in a category you did not tick.
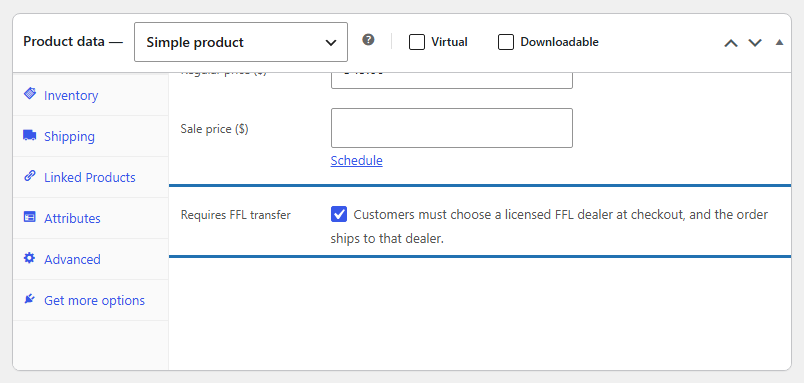
For variable products, the picker appears if the product, the chosen variation or any of the product’s categories is marked.
5 Check your checkout page
FFL Connect works with WooCommerce’s classic checkout. New WooCommerce stores often start with the block checkout, where the picker cannot appear.
- Go to Pages and edit your Checkout page.
- If the page contains a Checkout block, select it and delete it.
- Add a Shortcode block and type
[woocommerce_checkout]into it. - Update the page.
If the page already shows only that shortcode, there is nothing to change.
6 Place a test order
- Add one of your FFL products to the cart and open the checkout.
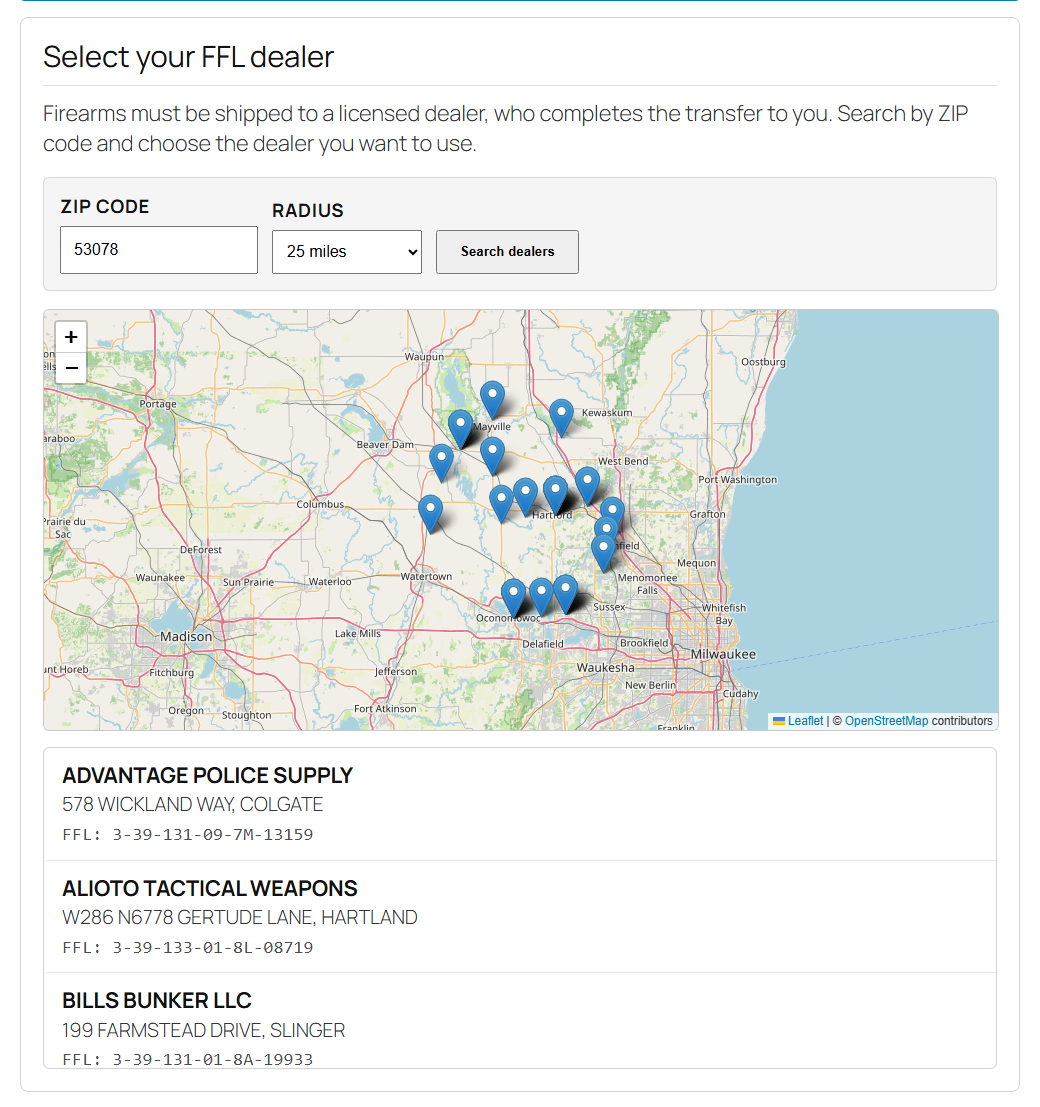
- In the dealer picker, enter a ZIP code and press search. Nearby dealers appear in a list and on the map.
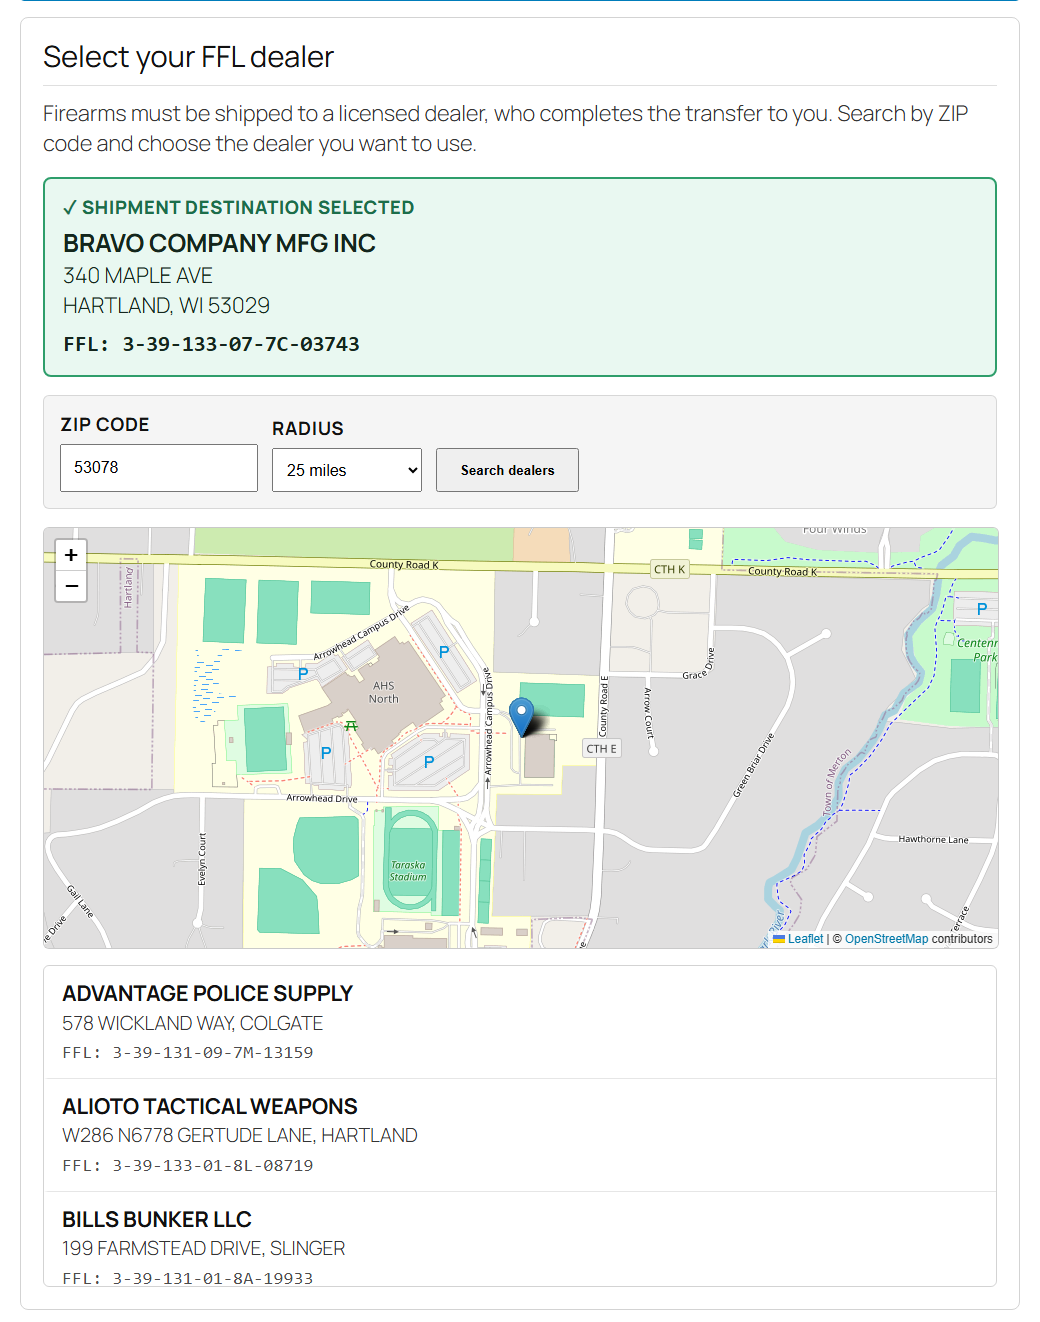
- Pick a dealer. It is confirmed at the top of the picker, and the order’s shipping address changes to that dealer.
- Complete the order with your usual test payment method.
Then try an order with no FFL product in the cart. The picker should not appear at all.
7 Find the dealer on an order
Open the order in WooCommerce › Orders. The dealer’s name and address are the shipping address, and the dealer’s FFL number is shown beneath it. The FFL number is also included in the order emails.
8 Troubleshooting
The dealer picker does not appear at checkout
- Check that the product in the cart is marked, either by category or with the Requires FFL transfer checkbox (step 4).
- Check that the checkout page uses the shortcode, not the Checkout block (step 5).
- If you use a caching or optimisation plugin, make sure the checkout page is excluded from page caching, then clear the cache.
“Test connection” fails
- Paste the key again and look for a stray space at either end.
- Check that your licence has not expired. Renewal reminders go to the email address used for the purchase.
- A few hosts and security plugins block outgoing requests. Ask your host to allow HTTPS requests to
api.fflconnect.net.
Customers see “search is unavailable”
Your store could not reach the dealer database. Press Test connection on the settings page to see why. While the search is unavailable, orders with FFL items are held back so that nothing ships without a dealer. Orders without FFL items are not affected.
The map is blank but the list works
Map images come from OpenStreetMap and load in the shopper’s browser. A content security policy or a privacy plugin on your site may be blocking tile.openstreetmap.org. The list still works and a dealer can still be selected.
A dealer is missing from the results
The list comes from ATF’s published record of active licensees, refreshed monthly. Large chain stores that do not take transfers are left out, and so are dealers who have asked not to be listed. A dealer licensed very recently will appear after the next monthly refresh.
My licence is about to expire
We email you before the year is up. Renew from the pricing page using the same email address and your existing key carries on working. There is nothing to change on your site.
Still stuck?
Email [email protected] with your store address and a description of what you see. A screenshot helps.